
Whatsapp: +86 13925897099
Address: No. 17, Chicheng 10th Road, Wanxiang Industrial Park, Yangdong District, Yangjiang City, Guangdong Province, China

How to Measure Thread Pitch and Thread Angle?
In machining and hardware manufacturing, threaded connections are one of the most common assembly methods. Whether for repair, procurement, or quality inspection, accurately measuring thread pitch (the distance between threads) and thread angle (the included angle of the thread form) is essential.
1. What are Thread Pitch and Thread Angle?
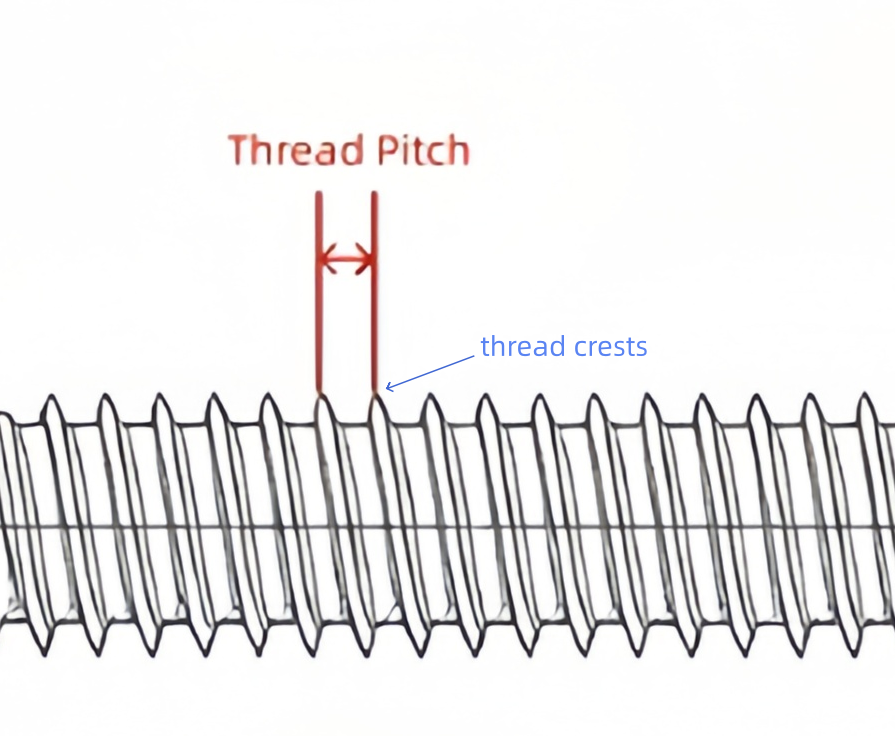
- Thread Pitch: The axial distance between adjacent thread crests (or roots). For metric threads, pitch is measured in millimeters (mm); for imperial threads, it is often expressed as threads per inch (TPI).
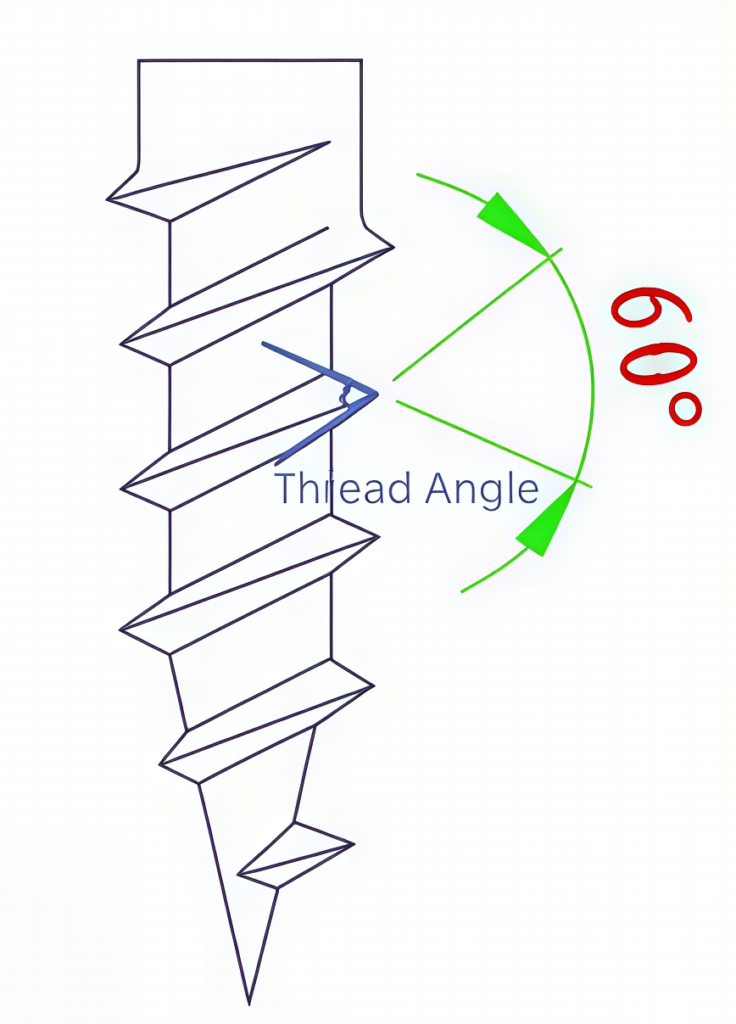
- Thread Angle: The included angle between the two flanks of the thread profile. Common standards include metric threads (60°), British Whitworth threads (55°), and US unified threads (60°).
2. Common Methods to Measure Thread Pitch
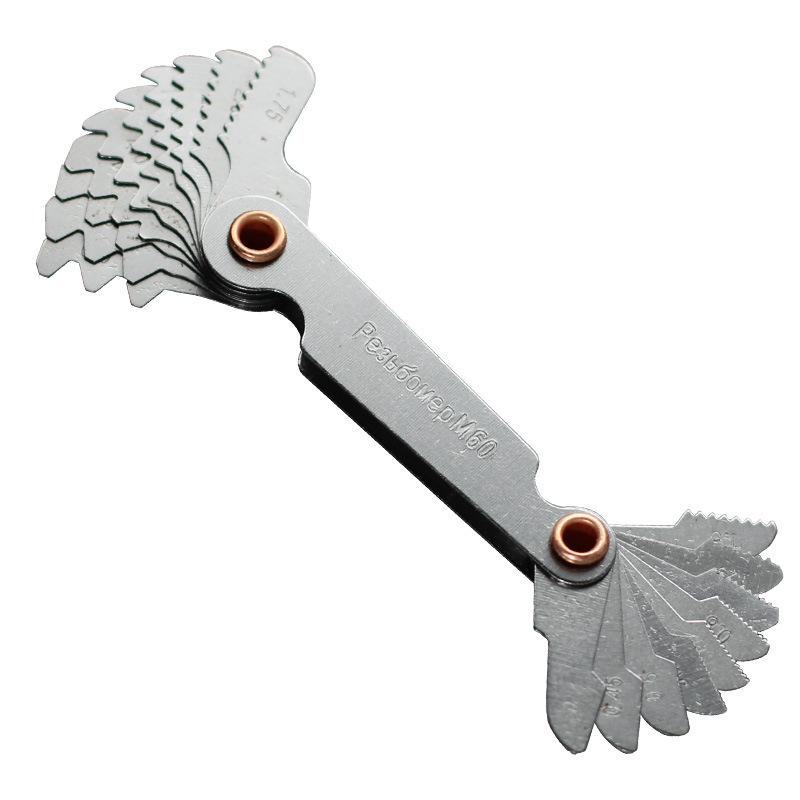
Method 1: Using a Thread Pitch Gauge
The thread pitch gauge is the fastest and most reliable tool. Each leaf is marked with the corresponding pitch (metric) or TPI (imperial).
- Select a leaf and press its teeth against the thread.
- If the gauge fits perfectly without any visible gap, the pitch matches.
- Read the value on the gauge.
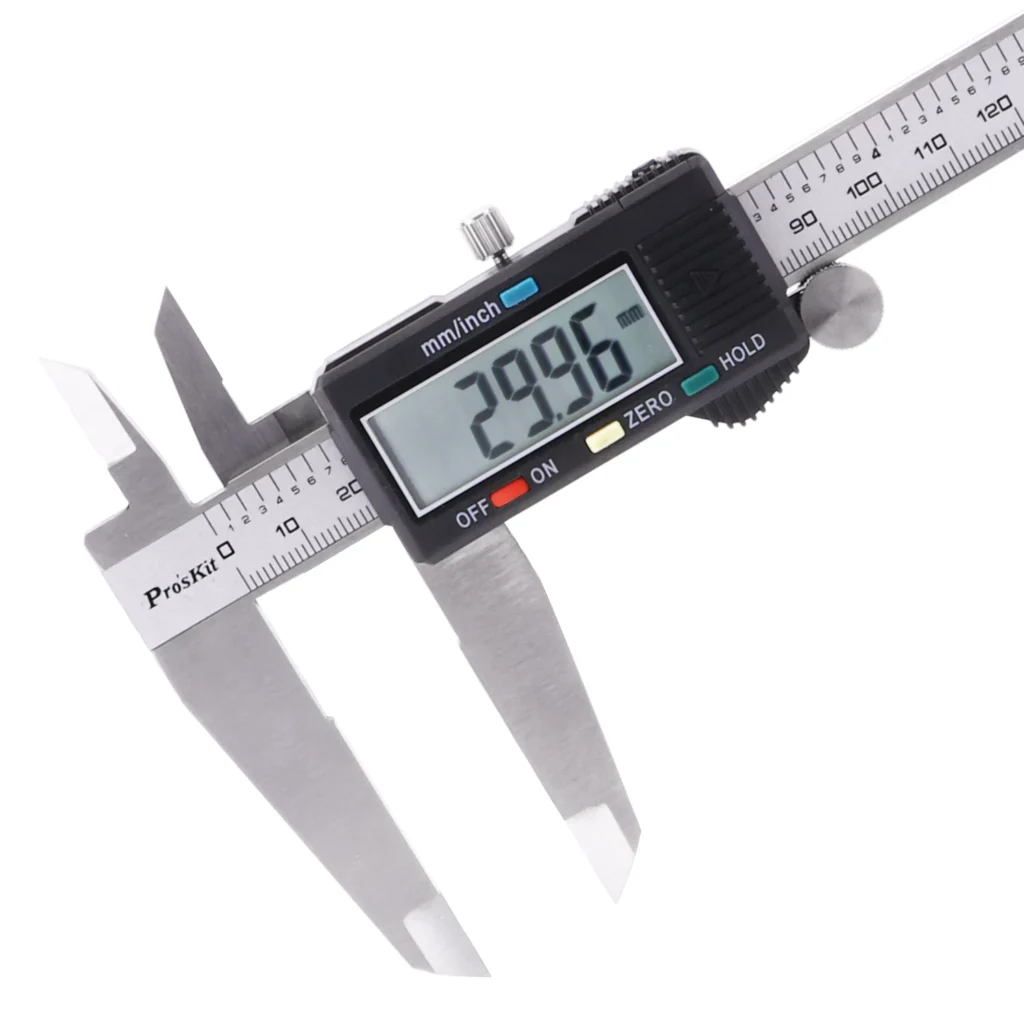
Method 2: Measuring Multiple Threads with a Vernier Caliper
If you don’t have a pitch gauge, use a vernier caliper to measure the total length of several threads, then divide by the number of thread spans.
- Align the caliper jaws with the thread crests and measure the axial distance from the 1st to the nth thread (e.g., 10 threads).
- Divide the total length by (n-1) to obtain the pitch.
- Repeat 2–3 times and take the average to reduce error.
Note: Common metric pitches are 0.5, 0.7, 1.0, 1.5, 2.0 mm; imperial pitch can be converted as TPI = 25.4 / pitch(mm).
3. Methods to Measure Thread Angle
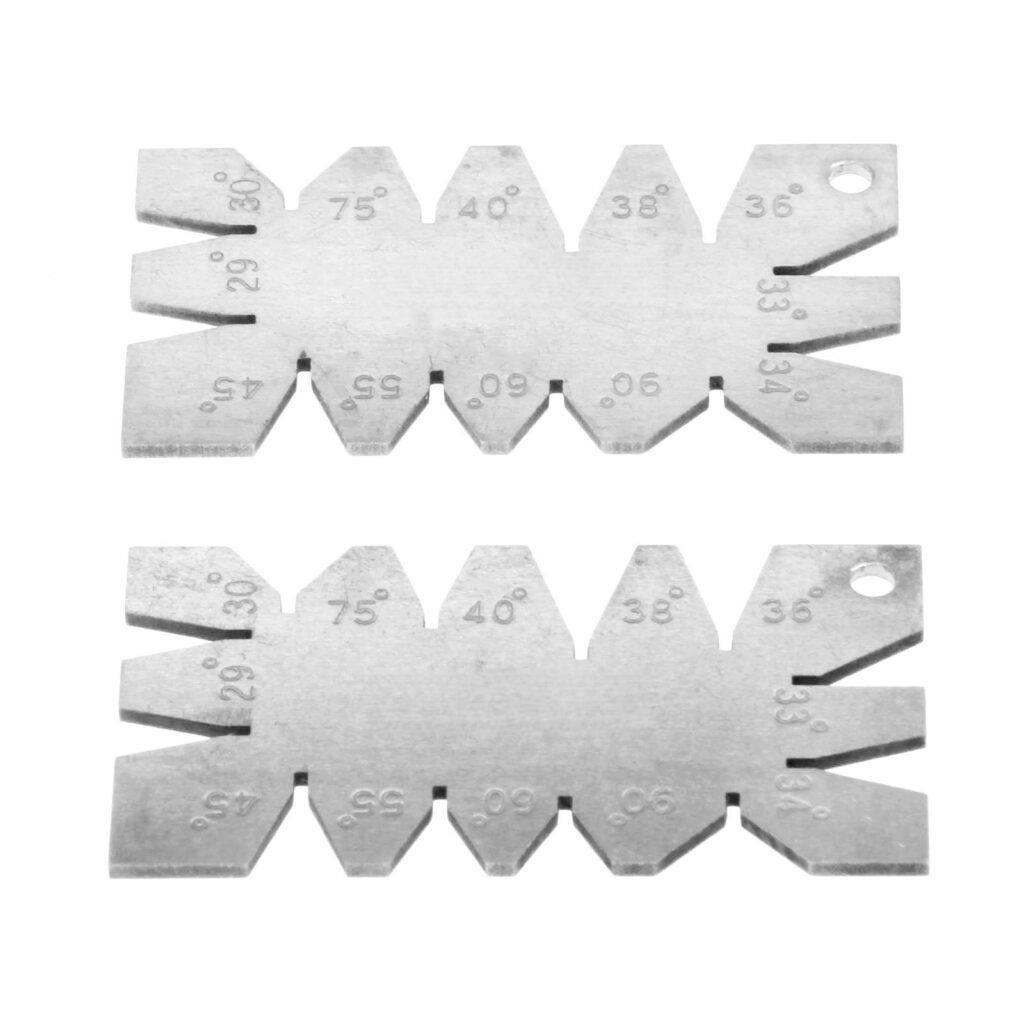
Method 1: Thread Angle Gauge
An angle gauge set contains metal leaves with precise angles (typically 55° and 60°).
- Select a gauge leaf and press its straight edge against the thread flank.
- Check for any light passing through the gap – no light means a perfect match.
- Read the angle marked on the gauge
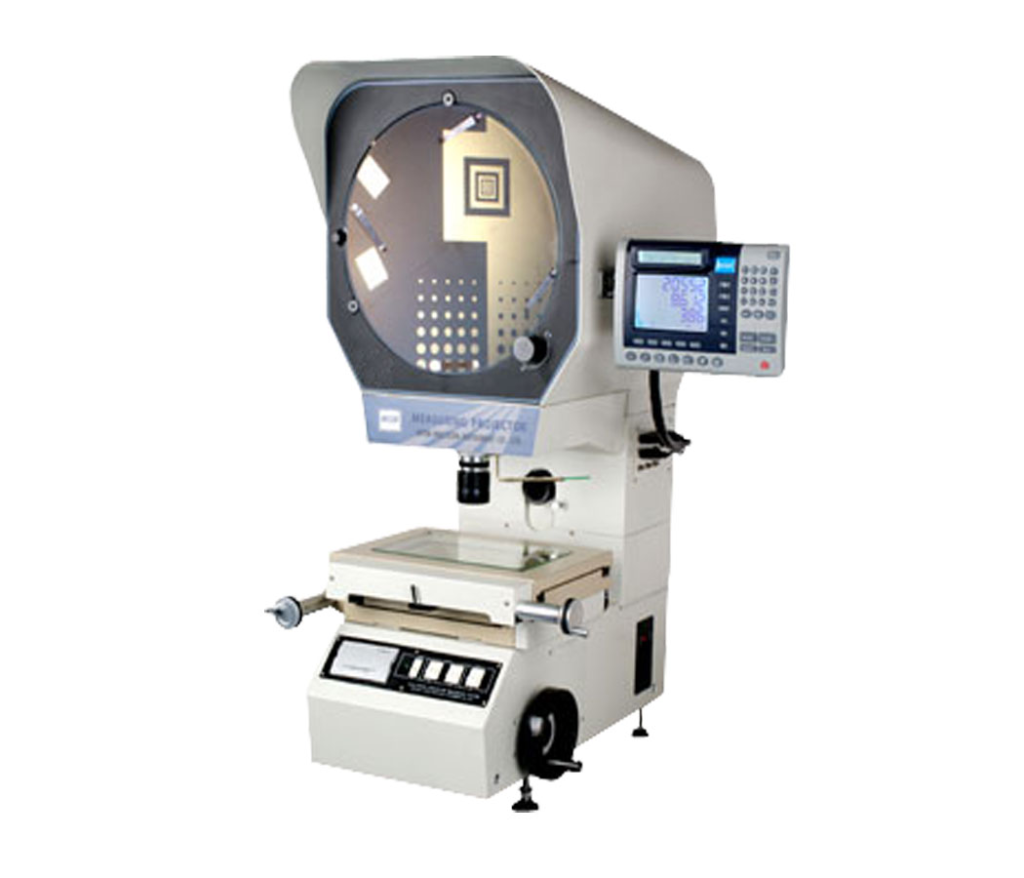
Method 2: Optical Comparator or Toolmaker’s Microscope
For high-precision requirements, use an optical comparator to magnify the thread profile and measure the angle.
- Secure the threaded part on the comparator stage.
- Adjust focus to project a clear thread contour onto the screen.
- Use the protractor scale on the screen to directly read the thread included angle.
4. Summary
- For pitch measurement, a thread pitch gauge is best; the multi thread caliper method is a reliable alternative.
- For angle measurement, start with an angle gauge; for higher accuracy, use an optical comparator.
- Remember common angle standards (60° is most common, 55° appears on Whitworth and some pipe threads).
- Accurate pitch and angle measurement helps you quickly match the right bolts or nuts, avoid procurement errors, and improve assembly quality.